
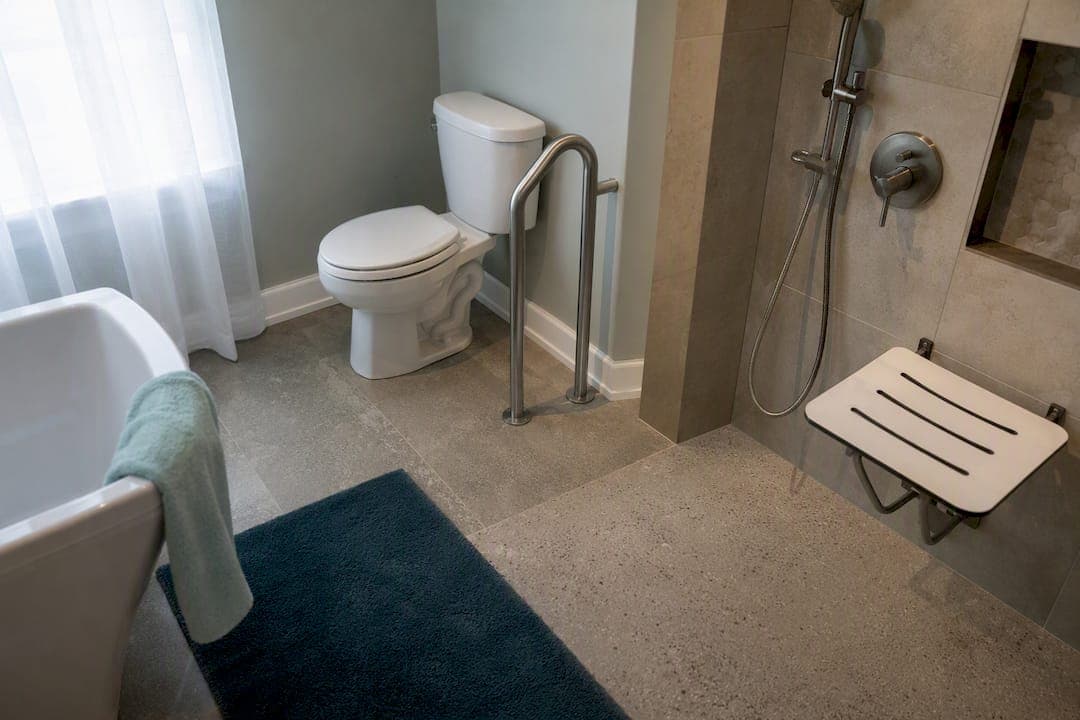
Three upgrades cut your bathroom fall risk faster than anything else: professionally anchored grab bars at the toilet and shower, non-slip surfaces on every wet-area floor, and a stable shower seat paired with a handheld sprayer, or a lowered threshold. If you do nothing else this year, do these three.
A basic version of this package runs $300 to $900 installed, covering two or three grab bars, a quality non-slip mat or floor treatment, and a sturdy shower chair. While you're at it, check your water heater setpoint. Anti-scald guidance commonly recommends a temperature ceiling near 120°F to reduce burn risk during a slip or a moment of confusion at the tap.
Here's where you need a professional instead of a weekend project:
- Grab bars going into anything other than solid wood studs (that means blocking work behind the wall)
- Any curbless or roll-in shower conversion, since it touches the subfloor and drain
- Thermostatic mixing valve installation, which is plumbing work, not a swap-the-fixture job
Key Takeaways
The most effective bathroom safety plan combines properly anchored grab bars, high-traction wet-area flooring, and accessible shower entry, sequenced so structural work happens before finishes.
| Point | Details |
|---|---|
| Start with the big three | Grab bars, non-slip flooring, and stable shower seating cut fall risk faster than any other single change. |
| Budget for a basic package | A first safety package with grab bars, mat, and chair typically runs $300 to $900 installed. |
| Blocking comes before tile | Insist on structural blocking rated for 250+ pounds behind grab bar locations while walls are still open. |
| Cap the water temperature | Set thermostatic mixing valves near 120°F to reduce scald risk during a fall or moment of confusion. |
| Get personalized help | Aging Solo's Clarity Session and planning checklist help you prioritize upgrades and prepare for contractor conversations. |
Table of Contents
- Priority Bathroom Safety Upgrades Older Adults Should Make First
- What Do Bathroom Safety Upgrades Cost, and in What Order?
- Getting the Installation Right: What to Ask a Contractor
- How Do You Pay for Bathroom Accessibility Upgrades?
- DIY vs. Hire: A Quick Decision Checklist
- Do You Need an Emergency Alert System for the Bathroom?
- How Do You Set Up Accessible Bathroom Storage?
- Is Your Bathroom Door Wide Enough for a Walker or Wheelchair?
- Why Ventilation Matters More as You Age
- What Regular Safety Checks Should You Run at Home?
- Which Upgrades Should You Tackle First?
- A Steadier Step, a Fuller Life
- How Aging Solo Helps You Plan the Right Upgrades
- Sources
- FAQ
Priority Bathroom Safety Upgrades Older Adults Should Make First
Not every upgrade carries equal weight. Some changes protect against the specific way falls actually happen in bathrooms, wet feet on a hard turn, a hand reaching for a towel bar that was never meant to hold weight, a shower with no seat and no support. Here's what matters, in the order it tends to matter.
1. Grab bars, placed and anchored correctly. At the toilet, install one bar on the side wall (typically 33 to 36 inches from the floor) positioned so a seated person can push up from it, and consider a rear bar behind the tank for added leverage. In the shower, a bar on the back wall and another near the entry give you support at the two moments people fall most: stepping over a threshold and standing from a seated rinse. Lengths generally run 18 to 36 inches, and angled bars (installed diagonally) often work better than a straight horizontal or vertical bar because they let a hand find the right grip height naturally as someone rises or lowers.
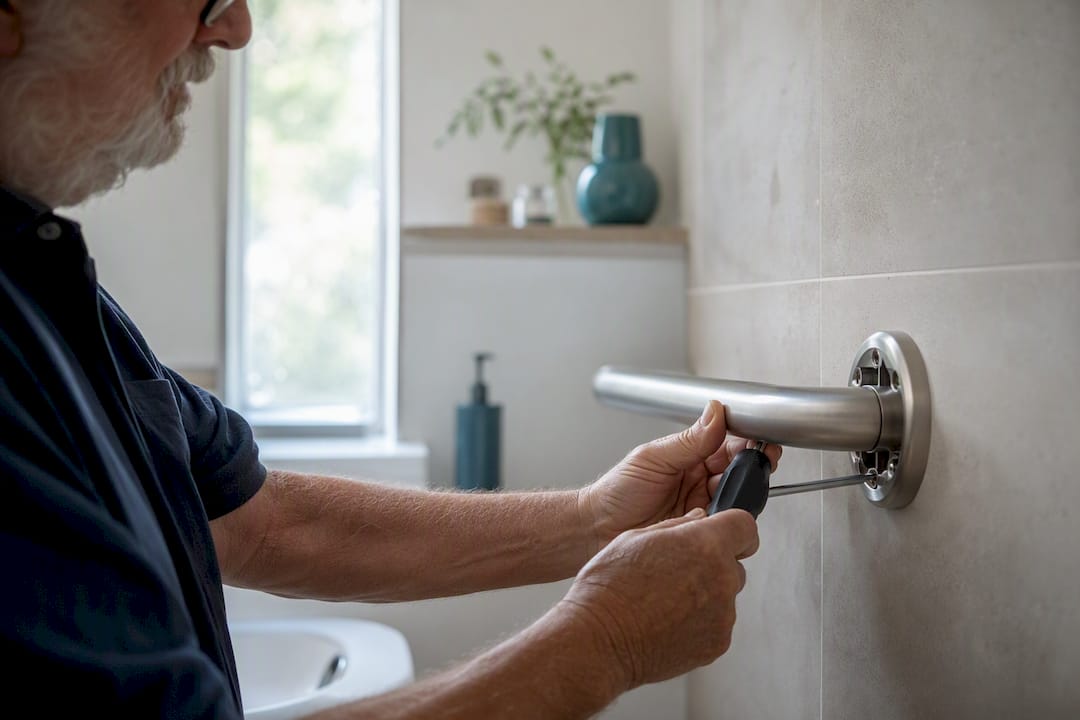
The anchoring matters more than the bar itself. Contractors and safety researchers agree that grab bars need to be secured into structural blocking rated for at least 250 pounds of dynamic load, not just anchored to drywall. A towel bar that pulls out of the wall under someone's full weight is worse than no bar at all.
2. A toilet at the right height. Standard toilets sit around 15 inches; comfort-height (also called "right height") models run 17 to 19 inches, which is easier on knees and hips for most adults and reduces the strain of standing from a low seat. A raised toilet seat adapter is a fine stopgap, but it often wobbles and can look and feel clinical. If you're already renovating, replacing the toilet outright usually beats bolting an adapter onto an old one.
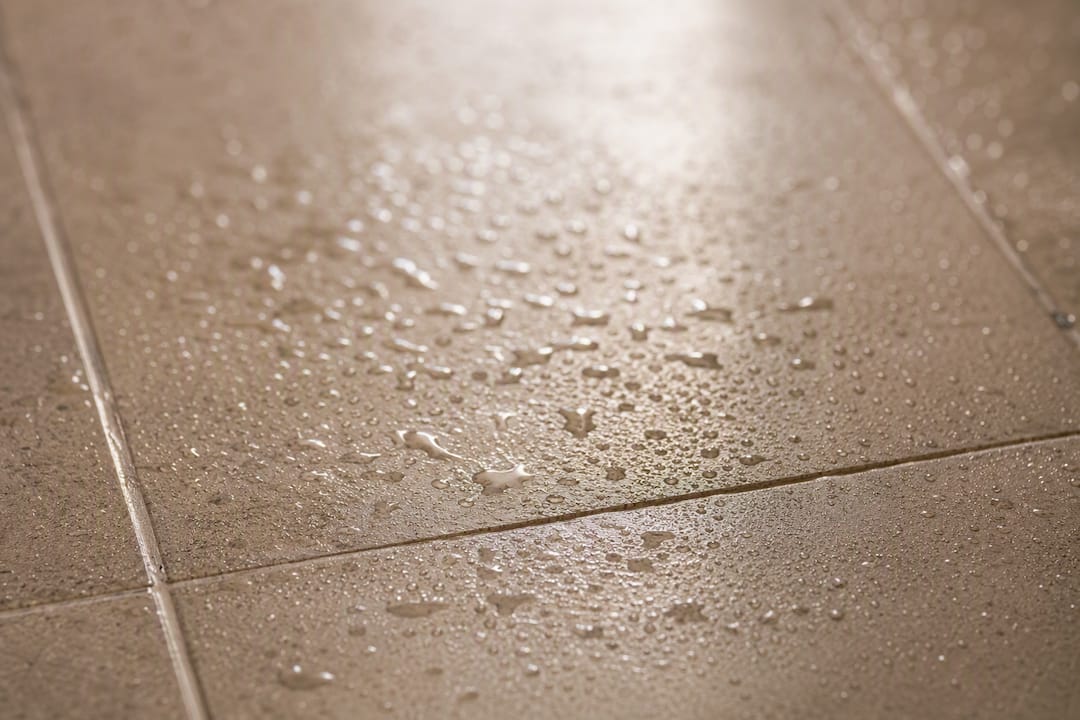
3. Flooring that grips when wet. Look for tile with a higher DCOF (dynamic coefficient of friction) rating in wet areas; textured or smaller-format tiles tend to score better without looking like a hospital floor. Anti-slip chemical treatments applied to existing tile are a reasonable short-term fix, but they wear down and need reapplication. Mats help in the moment but slide themselves unless they have a genuinely grippy backing, so treat them as a bridge, not a solution.
4. The right shower entry for your mobility. A tub cut-out (removing part of the tub wall to create a step-in opening) is the least invasive option. A low-threshold walk-in shower reduces the step height further. A fully curbless, roll-in shower removes the barrier entirely, which matters most if a walker or wheelchair is in the picture now or likely soon. Curbless designs require more subfloor and drain planning, so they belong in the "full remodel" category, not the weekend-project one.
5. Seating that won't tip. A built-in bench, poured as part of the shower floor, is the most stable option and holds up over decades. A portable shower chair with rubber feet is the practical middle ground for renters or smaller budgets. Either way, check that the drain slope near the seat doesn't leave standing water pooling under someone's feet.
6. Lighting that shows the whole path, not just the mirror. Motion-sensor night lights along the path from bed to bathroom, in a warm 2700K to 3000K tone, help older eyes adjust without the jolt of a bright overhead light. Inside the bathroom itself, layer a brighter, slightly cooler light near the vanity and shower for contrast and task visibility.
7. Lever handles and a capped water temperature. Lever faucets are easier to operate with arthritic hands or limited grip strength than round knobs. Pair that with a thermostatic mixing valve set near 120°F so a moment of confusion at the tap never turns into a scald injury.
Pro Tip: Ask your contractor for lever handles and textured, smaller-format tile before you ask about grab bars. Design choices that read as "modern renovation" rather than "medical equipment" make people far more likely to actually want the upgrade, and to keep it once it's installed.
What Do Bathroom Safety Upgrades Cost, and in What Order?
Think of the work in three tiers, and resist the urge to skip straight to the expensive one.
Tier one, immediate fixes, usually runs $300 to $900 installed: a couple of properly blocked grab bars, a non-slip mat or floor treatment, and a shower chair. This is the tier the CDC points to as a high-impact, low-cost starting move, and it's the right place to start almost regardless of budget.
Tier two, mid-range work, typically lands somewhere in the low thousands and covers a comfort-height toilet swap, a tub cut-out conversion, and professional anti-slip treatment on existing tile. Labor costs vary a fair amount by region, and any plumbing rough-in changes can trigger permit requirements that add time and cost.
Tier three, full remodel, is where curbless showers, subfloor lowering, and linear drain systems live. AARP's guidance on aging-in-place bathrooms notes these projects can run into the thousands, sometimes well beyond, depending on how much of the existing layout has to change.
The sequencing rule that saves the most money: structural decisions come before finishes. Blocking placement, drain slope, and layout have to be locked in while the walls are open. Choosing tile first and figuring out grab bar placement later is the single most expensive mistake homeowners make, because it usually means cutting into finished work to fix it.
Getting the Installation Right: What to Ask a Contractor
Some of this work is invisible once the tile goes up, which is exactly why it needs to be right the first time.
- Grab bars need continuous blocking (2x8 lumber or 3/4 inch plywood is typical) installed behind the exact future bar locations while the wall is still open. Toggle bolts into bare drywall cannot reliably hold a person's full weight in a fall.
- For curbless showers, the contractor has to decide between lowering the subfloor or using a linear drain before anything gets tiled. Lowering the subfloor affects the entire floor build-up; a linear drain preserves more of the existing subfloor but demands precise slope work to keep water moving where it should.
- Watch for common pitfalls: tile that looks fine dry but turns slick when wet, blocking that got skipped because "we'll add a grab bar later," incorrect drain slope that leaves standing water, and door swings that quietly eat the clearance a walker or wheelchair needs.
- Bathroom projects involving plumbing rough-in changes, structural work, or electrical additions typically require permits. Build that into your timeline early. A permit delay after the walls are already open costs far more than one built into the schedule from day one.
Blocking behind grab bar locations should go in during rough-in, before the drywall closes up, because retrofitting it later almost always means cutting into finished tile.
Pro Tip: Before you sign a contract, ask specifically where the blocking will go and get it in writing. A contractor who can answer that question without hesitation has done this kind of work before.
How Do You Pay for Bathroom Accessibility Upgrades?
Original Medicare generally does not cover home modifications, which surprises a lot of people who assume "medical necessity" automatically means "covered." That said, a few routes are worth checking before you assume the full cost falls on you.
- Check your Medicare Advantage plan. Some Advantage plans include supplemental benefits for home safety modifications that Original Medicare doesn't touch. Call your plan directly and ask by name.
- Look into Medicaid Home and Community-Based Services waivers if you qualify financially, since many states cover bathroom modifications specifically to help people avoid nursing facility placement.
- Ask about VA HISA grants if you're a veteran; the Home Improvements and Structural Alterations program funds exactly this kind of work.
- Get a doctor's note establishing medical necessity, collect two or three contractor estimates, and contact your local Area Agency on Aging, which often knows about state or nonprofit grant programs that never show up in a general search.
Confirm eligibility and documentation requirements before you commit to a contractor assuming a program will reimburse you. Coverage rules shift by state and by plan, and the paperwork almost always needs to be in place before the work starts, not after.
DIY vs. Hire: A Quick Decision Checklist
- Safe to DIY: motion-sensor night lights, adhesive non-slip strips, a handheld showerhead swap, a portable shower bench. Clean the surface thoroughly before applying anything adhesive, and follow the manufacturer's torque specs on any fixture you're screwing in yourself.
- Hire a pro for: any grab bar going into a wall without confirmed studs or blocking, curbless shower conversions, thermostatic valve plumbing, and toilet replacement that changes the rough-in.
- After the work is done: pull-test every grab bar with real body weight, confirm the tile's DCOF rating matches what was specified, run the shower long enough to test the thermostatic valve holds steady, check door clearance for a walker's actual width, and keep copies of every warranty.
Pro Tip: Take photos of blocking and rough-in work before the drywall goes back up. If a bar ever loosens years from now, you'll know exactly where the studs are without opening the wall again.
Do You Need an Emergency Alert System for the Bathroom?
A grab bar reduces the odds of a fall. It doesn't help much if a fall happens anyway and no one knows for twenty minutes. That's the gap emergency alert systems close, and the bathroom is the room where they matter most, since it's often the one room where a solo ager is alone behind a closed door.
Wearable medical alert pendants and wristbands, water-resistant enough for shower use, remain the most reliable option because they work if you fall and can't reach a wall unit. Wall-mounted call buttons near the toilet and inside the shower give you a second layer, especially useful if you tend to remove a wearable device before bathing. Voice-activated systems, including some smart speakers with fall-detection or emergency-calling skills, add a third option for people who'd rather speak than press a button.
The best setup usually layers two of these rather than relying on one. A wearable that goes everywhere with you, plus a wall button as backup for the moments the wearable comes off. Whatever system you choose, test it monthly. Alert systems fail quietly, a dead battery, a disconnected base station, and you only find out at the worst possible moment. If you're building out a broader emergency plan beyond the bathroom, a step-by-step safety guide for solo agers covers the other rooms and routines worth locking down.
How Do You Set Up Accessible Bathroom Storage?
Reaching for a shampoo bottle shouldn't require balance you don't have to spare. Accessible storage means everything you use regularly sits between waist and shoulder height, no stepping on a stool, no crouching to a low cabinet, no stretching past a shower door.
Built-in shower niches, recessed into the wall during a remodel, keep soap and shampoo within easy arm's reach without adding a shelf that collects water or becomes another thing to bump into. If a full remodel isn't in the cards right now, a corner caddy that mounts at the right height does a reasonable job for a fraction of the cost.
Outside the shower, pull-out drawers under the vanity beat a deep, dark cabinet you have to kneel in front of. You can see and reach everything without bending fully over, which matters more than it sounds like it should when balance is already a concern. For anyone using a walker or wheelchair, storage needs to sit low enough to reach from a seated position, generally no higher than about 48 inches, and open-front shelving works better than doors you have to manage while holding a cane or walker handle.
The goal isn't just fewer trips to a hallway closet. It's removing the small daily reach-and-twist moments that add up to real fall risk over a year of ordinary mornings.
Is Your Bathroom Door Wide Enough for a Walker or Wheelchair?
Standard interior doors run around 28 to 32 inches wide, which sounds workable until you're actually trying to get a walker or wheelchair through one. Building codes for accessible doorways call for a minimum 32 inches of clear width, and many accessibility advocates recommend 36 inches when a full remodel allows it, since that extra room accounts for the width of hands gripping walker handles on both sides.
Swing direction matters as much as width. A door that swings inward can trap someone against a wall or fixture if they fall near the doorway, and it eats into the turning radius a wheelchair needs to maneuver inside a small bathroom. Where the layout allows, an outward-swinging door, or better yet a pocket door that slides into the wall, frees up floor space that a standard hinged door quietly steals.
If a full doorway widening project isn't realistic right now, offset hinges are a genuinely useful workaround. They let an existing door swing clear of the frame, often gaining an extra two inches of usable width without any structural work. It's a small fix, but it's the kind of small fix that turns "barely fits" into "fits comfortably," which matters every single time someone uses that bathroom.
Why Ventilation Matters More as You Age
A bathroom that stays damp after every shower isn't just uncomfortable. It's a mold risk, and mold exposure hits older lungs and immune systems harder than younger ones. Good ventilation is a safety upgrade that rarely gets mentioned alongside grab bars and flooring, but it belongs on the same list.
An exhaust fan sized correctly for your bathroom's square footage should run during every shower and for a solid 15 to 20 minutes afterward, not just while you're standing under the water. Many older homes have fans that are undersized or barely functioning, so if yours sounds weak or you can still see fog on the mirror ten minutes after you've finished, it's worth having it checked or replaced.
Beyond the fan itself, small habits make a real difference: wiping down tile and glass after a shower, keeping the bathroom door open when you're not using it so air can actually circulate, and checking under the sink and around the tub caulk periodically for the telltale musty smell that shows up before visible mold does. Caulk that's cracked or peeling around the tub or shower isn't just cosmetic; it's a pathway for water into the wall cavity, which is exactly where mold likes to grow unseen.
If you notice discoloration on the ceiling above the shower or a persistent musty smell that cleaning doesn't fix, that's worth a professional look rather than a bigger fan and hoping.
What Regular Safety Checks Should You Run at Home?
The upgrades you install are only as good as their upkeep. A grab bar that was rock solid three years ago can loosen. A non-slip mat can wear smooth in the exact spot where you always step.
Set a standing habit of checking three things every few months: pull-test every grab bar with real weight to confirm it hasn't loosened, run a hand over your non-slip mat or treated flooring to feel for worn or slick patches, and check that your night lights and any emergency call buttons still have working batteries. None of this takes more than ten minutes total.
Once or twice a year, look a little closer. Check caulk around the tub and shower for cracking, since that's where hidden water damage starts. Test your water heater temperature at the tap with a simple thermometer to confirm it's still holding near that 120°F ceiling; thermostatic valves and water heaters can drift over time. If you have a shower chair, check that its rubber feet haven't hardened or cracked, since that's what keeps it from sliding.
Write the date on a sticky note inside a cabinet door after each check. It sounds small, but it's the difference between "I think I checked that recently" and actually knowing.
Which Upgrades Should You Tackle First?
Not every bathroom needs every upgrade, and not every solo ager has the budget or the physical need for a full remodel today. The smartest approach starts with an honest look at your own risk factors, not a generic list.
Ask yourself three questions. Do you currently use, or do you expect to soon need, a cane, walker, or wheelchair? Have you had a near-fall or an actual fall in the bathroom in the last year? Does anything in your current bathroom already feel unstable, a wobbly towel bar you lean on, a mat that slides, a step you have to think about every time?
If the answer to any of those is yes, grab bars and flooring jump to the top of the list regardless of budget, because guides on prioritizing bathroom safety work consistently point to secure handholds and slip-resistant surfaces as the foundation everything else builds on. Seating and toilet height come next, especially if you're managing joint pain or reduced strength. Threshold and layout changes, the curbless shower, the widened doorway, belong later in the sequence unless a mobility device is already part of your daily life, in which case they move up.
Think of it as building outward from where you actually stand today, not planning for a hypothetical worst case that may never arrive. A resource like Aging Solo's guide to independent senior bathroom modifications can help you match specific upgrades to your actual situation rather than guessing.
A Steadier Step, a Fuller Life
Last winter, a woman I'll call Ruth told us about the first night her new motion-sensor light clicked on in the hallway. She said it felt less like a safety device and more like the house was finally paying attention to her. That's the shift. A grab bar isn't a concession to getting older. It's what lets you keep living exactly the way you want to, alone, capable, unbothered.
Independence isn't the absence of help. It's having just enough support that you barely notice it's there. If you want a hand thinking through what your bathroom actually needs, Aging Solo's free checklist is a good place to start.
How Aging Solo Helps You Plan the Right Upgrades
Staring at a bathroom full of possible upgrades, grab bars, flooring, a whole remodel, and trying to figure out what actually matters for your situation is its own kind of overwhelming. That's the gap Aging Solo fills. Instead of a generic contractor pitch or a one-size-fits-all product list, Aging Solo offers a 45-minute Solo Aging Clarity Session over Zoom, where you talk through your specific home, your specific mobility concerns, and your specific budget with someone who helps you turn that into a prioritized plan.
Pair that with the downloadable bathroom planning checklist, and you walk into contractor conversations already knowing what to ask about blocking, drain slope, and permit timing, rather than hoping the contractor brings it up first. Aging Solo built its planning tools specifically for people managing this without a spouse or nearby adult child double-checking the details, which means the guidance assumes you're the one making the final call. If you're ready to turn a long list of maybe-someday upgrades into a plan with an actual order, start with the aging in place guide and book your clarity session from there.
Sources
- Systematic review — home modifications and fall prevention (PMC)
- AARP — 14 bathroom updates for aging in place
FAQ
Does Medicare Pay for Bathroom Safety Upgrades?
Original Medicare generally does not cover home modifications like grab bars or walk-in showers. Some Medicare Advantage plans, Medicaid HCBS waivers, and VA HISA grants can help, so check directly with your plan or agency before assuming coverage.
How Can I Make My Bathroom Safer for an Elderly Family Member?
Start with the three highest-impact fixes: grab bars anchored into structural blocking, non-slip flooring in wet areas, and a stable shower seat with a handheld sprayer. Add motion-sensor night lighting and a thermostatic valve capped near 120°F for a well-rounded safety upgrade.
Is There Really a Bathroom Remodel Program for Seniors?
There's no single national program, but several routes exist, including state Medicaid waivers, VA HISA grants for veterans, and local Area Agency on Aging programs that sometimes offer grants or low-cost contractor referrals. Eligibility and documentation requirements vary, so confirm details before committing to a project.
How Many Times a Week Should an Older Adult Shower?
This is a personal-care question rather than a bathroom-safety one, and it varies by skin type, activity level, and individual preference; most guidance simply emphasizes doing it safely, with a secure seat and grab bars, whatever frequency you choose. Focus your planning on making each shower stable rather than on a fixed weekly number.
What's the Single Best First Upgrade for Fall Prevention?
Properly anchored grab bars at the toilet and shower consistently rank as the highest-impact, lowest-cost upgrade, provided they're installed into structural blocking rather than drywall alone. Pair them with non-slip flooring for the biggest combined impact on fall risk.