
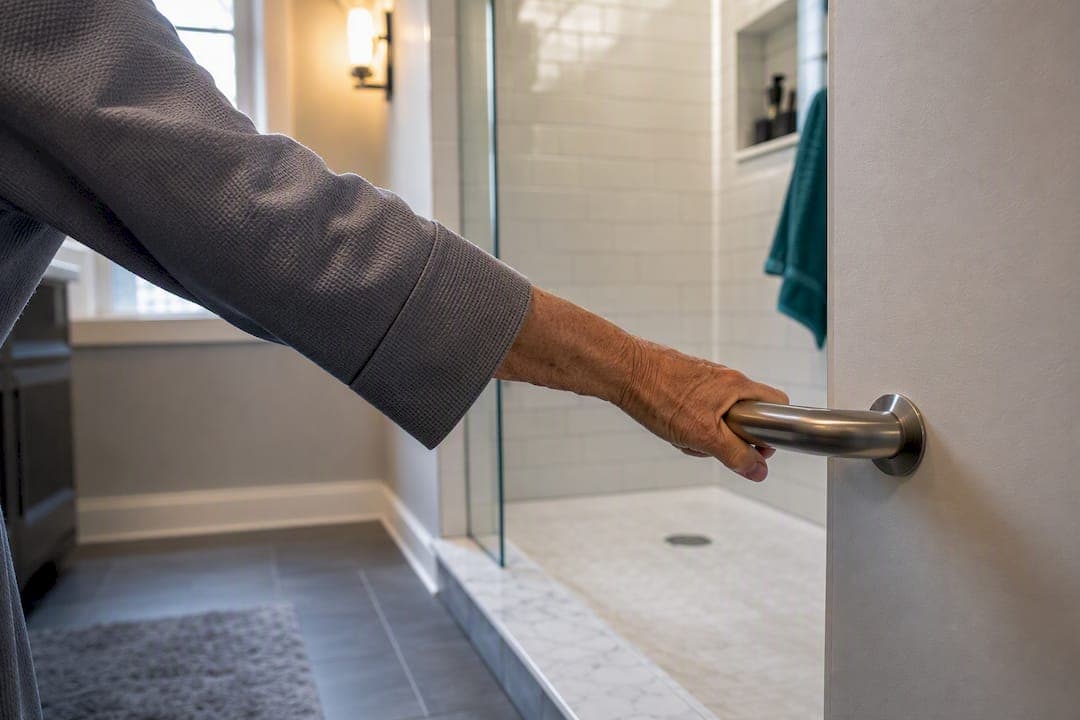
Put a vertical bar a few inches inside the shower entrance and a horizontal bar roughly around standard adult waist height on the side wall. That combination covers most adults using a shower or tub. Adjust the exact spot to your own reach and height, and mount every bar into solid structural backing like studs or blocking, avoiding drywall alone.
TL;DR:
- Mounting grab bars into studs or solid blocking is essential; drywall anchors and suction mounts are unreliable for supporting weight.
- Horizontal bars should be installed between 33 and 36 inches from the floor, with at least 1½ inches of clearance from the wall for a full grip.
- Vertical and angled bars are best suited for tub transfers, with the choice depending on the motion involved and user needs.
- For tubs, a bar near the entry helps with stepping over the rim, and another along the inner wall supports seated transfers or reaching.
- Proper placement and secure mounting are critical, with a post-installation check and re-tightening recommended to ensure safety.
Table of Contents
- Where Should Grab Bars Go in a Shower?
- Where Should Grab Bars Go in a Bathtub?
- What's the Right Height and Clearance for a Grab Bar?
- How Do You Mount a Grab Bar So It Actually Holds?
- Which Type of Grab Bar Fits Your Bathroom?
- What Are the Most Common Grab Bar Mistakes?
- What Aging Solo Recommends for Bathroom Safety
- One Bar Changed How I Move Through My Own Bathroom
- How Aging Solo Helps You Get Placement Right the First Time
- Standards and Resources Worth Bookmarking
- Sources
- FAQ
Where Should Grab Bars Go in a Shower?
The shower is where most falls happen, and it's also where placement gets the most confusing, because no two stalls are laid out the same way. Once you understand the three functional zones, the guesswork mostly disappears.
The entry wall is your first stop. A vertical bar mounted near the jamb, about 4 to 6 inches inward, gives you something to grab the moment you step over the threshold, which is when most people lose their footing. Vertical bars in this spot usually run 18 to 24 inches long, though taller users or those with limited reach sometimes benefit from a longer 24 to 36 inch bar that covers more of the step-through motion. If your entryway is wide or you tend to hesitate at the threshold, a second vertical bar on the opposite side isn't overkill. It's just good coverage.
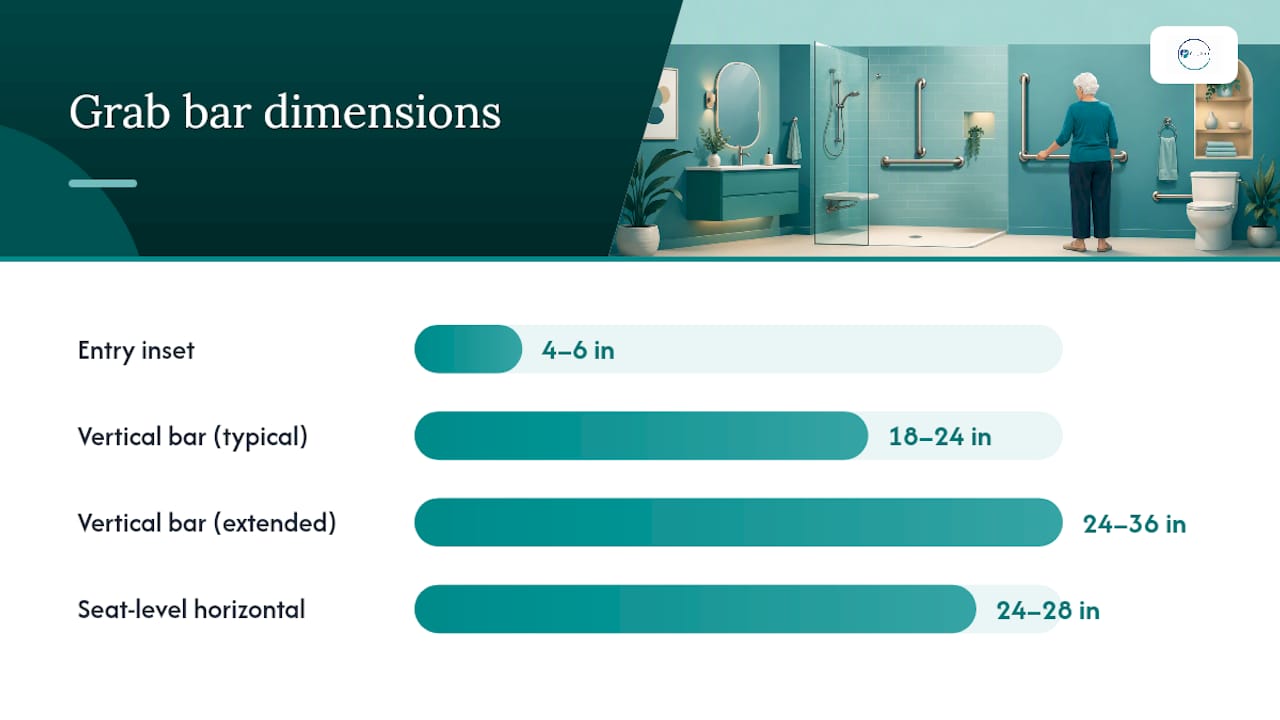
The side wall is where a horizontal bar earns its keep. Mounted at roughly waist height, it should sit close enough that you can hold the entry bar with one hand and reach the side bar with the other without stretching. That overlap matters more than people expect. A gap between reachable points is exactly where someone loses balance mid-transfer.
The front and back walls come into play when you're adjusting water controls or standing in a wider shower where a single bar can't cover the whole space. Some homeowners choose an L-shaped bar here, which combines a vertical and horizontal segment into one fixture, giving you a grip whether you're stepping in or steadying yourself while you wash.
A few configuration notes worth flagging:
- Shower seats or built-in benches shift the ideal horizontal bar lower, closer to 24 to 28 inches above the seat surface, not the floor.
- Sliding shower doors limit where a vertical bar can go without hitting the track, so measure the door's swing or slide radius before you drill.
- If a shower chair is part of daily use, add a bar positioned for pushing up from a seated position, angled slightly toward the exit path.
Where Should Grab Bars Go in a Bathtub?
Tubs create a different set of problems than showers. You're not just standing and reaching, you're often lowering your body down and pushing back up, sometimes over a taller entry point than a shower curb.
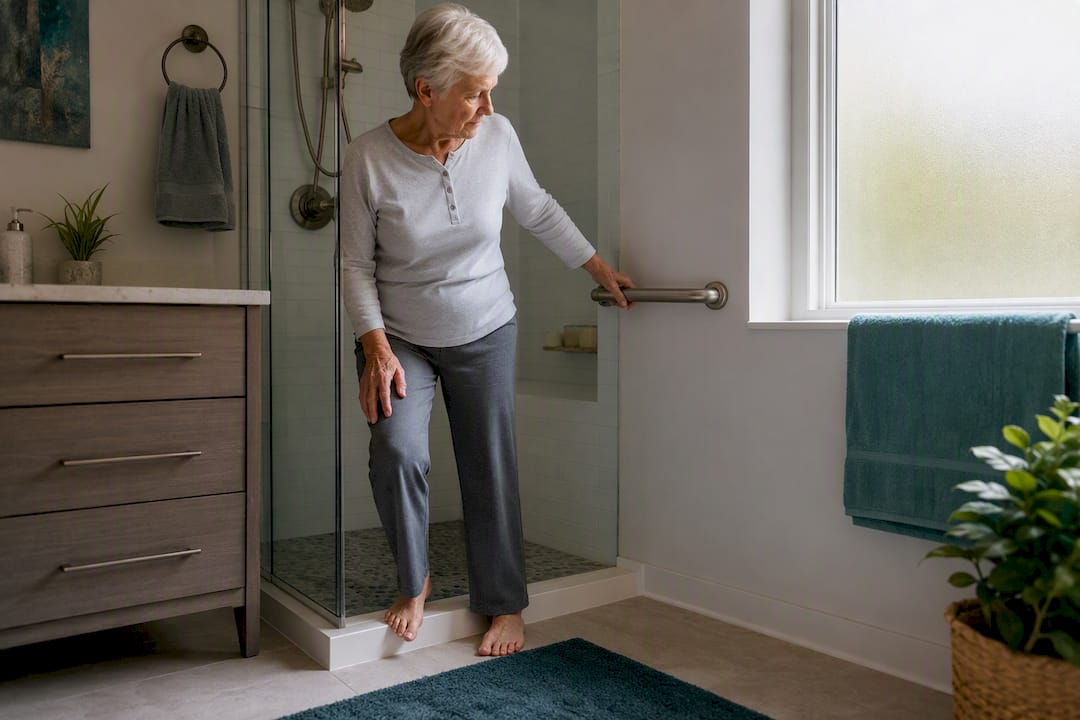
Start with a bar near the tub entry, positioned to help with the step over the rim. Then run a second bar along the long inner wall, placed where your hand naturally lands when you're seated and reaching to steady yourself. This is usually a few inches below shoulder height for someone seated in the tub, which is lower than the standard 33 to 36 inch standing height used in showers.
If you or the person using the tub transfers from a bench, wheelchair, or shower chair rather than stepping over the rim, an angled bar near the entry point often works better than a straight horizontal one. The angle follows the natural arc of a body lowering itself down, giving a grip at multiple points along that motion instead of one fixed height.
Tub style changes the calculation, too:
- Alcove tubs (the boxed-in style against three walls) have the most surface area for placement flexibility, since studs are usually accessible behind at least two walls.
- Freestanding and clawfoot tubs often have no adjacent wall at all, which means a floor-mounted or rim-clamped bar may be the only option, and those need careful checking for stability since they don't anchor into structure the way wall-mounted bars do.
- Rim-mounted bars matter most on tubs without nearby wall space, but they should be tested for wobble before anyone relies on them for a real transfer.
What's the Right Height and Clearance for a Grab Bar?
Here's the number to remember: mount horizontal grab bars with the top of the gripping surface between 33 and 36 inches from the floor. That range comes straight from ADA guidance on grab bar placement, which specifies those exact heights along with a 1½ inch minimum clearance between the bar and the wall.
By the numbers: ADA specifications call for 33 to 36 inches of height to the top of the gripping surface, 1½ inches of wall clearance, and a grip diameter between 1¼ and 1½ inches, according to ADA (archived) grab bar figures.
That 1½ inch clearance isn't arbitrary. It's wide enough for a full hand grip but tight enough to stop your forearm from sliding through and getting pinned against the wall if you lose your balance, a real risk with bars mounted too far out. The Access Board's ADA chapter on grab bars lays out the technical spacing and positioning rules that commercial installers follow, and those same numbers work well for home use even though ADA compliance is only legally required in public buildings.
A few practical notes for applying these numbers at home:
- Measure height from the floor to the top of where your hand actually grips, not to the bar's mounting bracket.
- Grip diameter between 1¼ and 1½ inches fits most adult hands comfortably. Thicker bars can be harder to grasp quickly.
- If the primary user is notably shorter or taller than average, or uses a wheelchair for transfers, adjust height by a few inches rather than forcing the standard range.
Treat the ADA numbers as your safe starting point, then fine-tune based on the actual person using the bathroom.
How Do You Mount a Grab Bar So It Actually Holds?
A grab bar is only as strong as what's behind the wall. This is the step people rush, and it's the one that matters most.
- Find the studs. Use a stud finder along the wall where you plan to mount, and mark both edges of each stud with tape so you know exactly where solid wood sits.
- Match your bar's mounting flanges to stud spacing. Standard studs sit 16 inches apart, so a 24 inch bar often lands one flange on a stud and the other in open space, which is where blocking comes in.
- Use toggle bolts only as a compromise. They can hold in drywall alone, but they're meaningfully weaker than a screw driven into solid wood, and InspectAPedia's retrofit guidance treats them as a workaround, not a first choice.
- Add blocking if studs don't line up. This means opening the wall, screwing in a piece of plywood or dimensional lumber across the stud bay, then patching and refinishing the surface. It's more work, but it turns any wall into a secure mounting point.
- Hire a licensed contractor when the wall is tiled, when falls have already happened, or when you're not confident cutting into a finished surface. An occupational therapist can also help with exact placement if the primary user has a specific mobility limitation.
Pro Tip: If you're opening the wall anyway for one bar, add blocking across the full width of the shower or tub wall while it's open. It costs a little more time now and saves you from cutting into finished tile again later.
Which Type of Grab Bar Fits Your Bathroom?
Not every bar does the same job, and picking the wrong style is one of the most common reasons people end up with a bar that looks right but doesn't actually help.
- Horizontal bars are the workhorse for standing balance and lateral support, typically running 18 to 48 inches depending on wall length and how much coverage you need.
- Vertical bars work best for the up and down motion of stepping over a tub rim or shower curb, usually 18 to 24 inches.
- Angled bars split the difference, following the natural motion of lowering into a seated position, which makes them well suited to tub transfers.
- L-shaped bars combine vertical and horizontal support in one fixture, a solid choice when wall space is limited but you need both entry and standing support.
- Folding bars fold flat against the wall when not in use, useful next to a toilet or tub where a fixed bar might get in the way.
- Freestanding or floor-to-ceiling poles work in bathrooms without a wall close enough for standard mounting, common near clawfoot tubs.
Finish matters more than people think. A textured or peened grip prevents slipping when hands are wet and soapy, while a smooth finish feels more comfortable but offers less traction. For anyone with reduced grip strength, textured wins.
One warning worth repeating: suction-mounted grab bars are fine for short-term use, like a hotel bathroom for a weekend, but they should never replace a properly mounted bar for daily use at home. Suction seals can fail without warning, and there's no way to test their hold the way you can test a bolted connection.
What Are the Most Common Grab Bar Mistakes?
A surprising number of installed grab bars fail the people they're supposed to protect, and it's rarely because the bar itself was wrong. It's the placement or mounting.
- Mounting into drywall alone. It looks solid until real weight comes down on it fast, which is exactly when you need it most.
- Placing the bar too far from where you actually transfer or reach for controls. A bar six inches out of reach might as well not exist.
- Choosing the wrong length, or mounting a bar where it swings into a shower door or slider.
- Wobble under load. If a bar moves at all when you lean on it, stop using it and recheck the mounting.
- Loosening hardware over time. Bathroom humidity affects screws and anchors, so a bar that felt solid at installation can loosen months later.
Pro Tip: After the first week of use, go back and re-torque every screw on a newly installed bar. Humidity and initial use settle the hardware slightly, and a quick tightening now prevents a bigger problem later.
Before calling the installation finished, physically simulate the motion the bar is meant to support. Step in and out, reach for the bar mid-shower, or practice the tub transfer if that's the use case. If any part of that motion feels awkward or out of reach, adjust before you consider the job done.
What Aging Solo Recommends for Bathroom Safety
This guide reflects the same practical, no-nonsense approach Mike brings to every bathroom safety upgrade Aging Solo covers: measure twice, mount into something solid, and adjust for the actual person using the space instead of a generic average.
If your walls are tiled, your falls have already started, or you're not confident with a stud finder and a drill, this is a good moment to bring in a licensed installer or an occupational therapist rather than guessing. For everything else, the guidance above gets most solo agers most of the way there on their own. If you want a deeper look at retrofit options and contractor considerations, Aging Solo's senior bathroom modification guide walks through it in more depth, and one honest fact worth remembering: a well-placed grab bar is a low-effort way to protect the independence you've already built, not a sign that anything about your life needs fixing.
One Bar Changed How I Move Through My Own Bathroom
I still remember testing the reach on that first bar I installed, holding it and stepping back into the tub slowly, half expecting it to feel like nothing. It didn't feel like nothing. It felt like the floor finally had a partner.
If you're standing in your bathroom right now wondering where to start, do two things. Measure your own reach and mark the spot with a pencil before you touch a drill. Then confirm there's a stud or solid blocking behind that mark. That's it. That's the whole first step, and it's enough to move you from wondering to doing, which is where confidence actually lives.
— Mike
How Aging Solo Helps You Get Placement Right the First Time
Reading measurements on a page is one thing. Standing in your actual bathroom, staring at tile you don't want to cut twice, is another. That's where a lot of solo agers get stuck, not because the information isn't out there, but because applying it to one specific, oddly shaped bathroom with one specific body and one specific budget takes judgment a checklist can't give you.

The Solo Aging Clarity Session is a 45 minute Zoom conversation built for exactly that gap. Instead of generic advice, you get a real walkthrough of your situation, help to prioritize which bathroom changes matter most right now, and guidance on finding a vetted installer or occupational therapist if your walls or mobility needs call for one. It's $97 for a single session, and it's designed for the parts of solo aging that don't fit neatly into a blog post. If you've been putting off the grab bar project because you're not sure where to start or who to call, book a Solo Aging Clarity Session and get a plan that actually fits your bathroom, your body, and your life.
Standards and Resources Worth Bookmarking
The ADA's archived grab bar specifications remain the most reliable numeric reference for height and clearance, even though ADA compliance is legally mandatory only in commercial and public buildings, not private homes. Homeowners can still use those numbers as a dependable safety baseline. The Access Board's ADA chapter on grab bars adds more technical detail on spacing and positioning for anyone working with a contractor. For broader context on which bathroom upgrades matter most for aging in place, Aging Solo's guide to common safety risks is worth a read, and if a door swing is limiting your entry bar placement, this breakdown of bathroom door options explains how door width and clearance factor in.
Sources
- ADA (archived) — grab bar placement figures
- Access Board — ADA chapter on grab bars and accessibility
- InspectAPedia — grab-rail design and retrofit advice
FAQ
Should Grab Bars Be Angled or Straight?
Straight horizontal bars work best for standing balance and lateral movement, while angled bars suit the motion of lowering into or rising from a seated position in a tub. Most bathrooms benefit from at least one straight horizontal bar plus an angled or vertical bar near a tub entry point.
What Are Two Requirements When Installing Grab Bars in a Bathroom?
Grab bars need to be mounted into a stud or solid blocking rather than drywall alone, and they need at least 1½ inches of clearance from the wall to allow a full hand grip without pinching, per ADA specifications. Skipping either requirement is the most common reason a bar fails under real weight.
What Is a Good Height for a Grab Bar?
A horizontal grab bar should sit between 33 and 36 inches from the floor to the top of the gripping surface, which is the ADA's standard reference range. Adjust slightly for a user's height, and use a lower height for bars near a tub meant for seated support.
What Type of Grab Bar Is Best for Seniors?
A horizontal bar at standard height combined with a vertical entry bar covers most standing and stepping needs, while an angled bar helps with seated tub transfers. Suction-mounted bars should be avoided for daily use since they can fail without warning, and a textured grip finish adds traction for wet hands.
Do I Need a Professional to Install a Grab Bar?
You can install a grab bar yourself if you're comfortable finding studs and using a drill, but tiled walls, complex framing, or a history of falls are good reasons to hire a licensed installer. Aging Solo's Solo Aging Clarity Session can also help you weigh whether a professional install or occupational therapist referral makes sense for your specific bathroom.